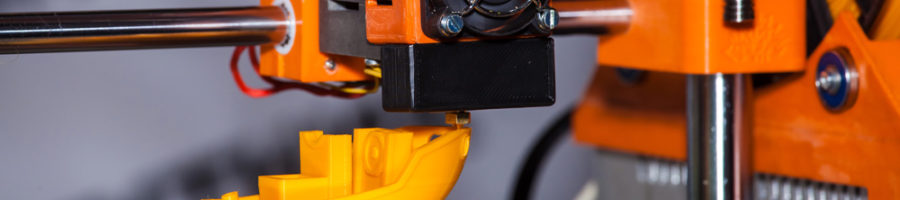
Print your own parts for the Losi Mini-T 2.0
Below is a selection of 3D printable parts for the Losi Mini-T 2.0. These are curated here with the permission of their creators. Please thank them if you end up using their file. Note all files are subject to their original copyright agreements and are for personal use only.
Mini T 2.0 Split Waterfall brace
This is a replacement waterfall brace for the Mini T 2.0 It is mostly a drop in replacement but requires a longer 2mm screw for the battery/radio tray pivot. I split it into two pieces to make it printable and strong, I recommend ABS or PETG and solid infill. -By Paul Barsamian
https://www.thingiverse.com/thing:4128548
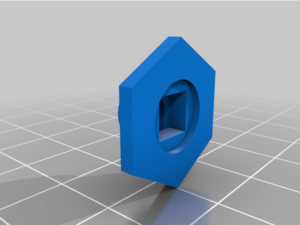
Mini-T 2.0 Slipper Eliminator
This is a slipper eliminator for the Losi Mini T 2.0, For those pros who don’t need no stinkin slipper clutch. I found with mine that I had a LOT more power and punch as well as control after removing the slipper. Too much in some cases (over shooting jumps with a mamba motor on 3s). For this to work, you need to keep the slipper plate that is closest to the gearbox, remove both slipper pads from the stock spur gear, and mesh this piece into the hex pattern on the gear. There is a square relief on the underside that mates with the square protrusion on the gearbox side slipper plate. use the stock nut to tighten it all down but not too tight as I’ve noticed this will push the gear off center and create a wobble.
Print at 100% infill and pla should be fine. Most printers won’t need support for bridging these short distances but you choose that to your liking. I prefer printing small stuff like this at fine resolution. -By Paul Barsamian
Mini T 2.0 battery/radio tray
Standard height and high clearance battery strap/stays which have been widened to provide more mounting area for electronics. The high clearance battery/radio tray gives 5mm extra clearance for an 850-ish 3 cell Zippy or similar battery. Strongest print will likely be vertical so the layer lines are running from the front of the part to the back. -By Paul Barsamian
https://www.thingiverse.com/thing:4081526
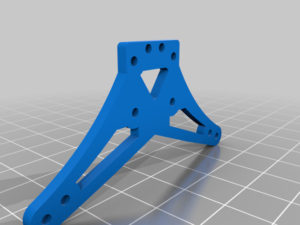
Mini T 2.0 Front Shock Tower
By Request, (actually haven’t broken and needed this part; yet). This a drop in replacement for the front shock tower that is 3D printable. This profile could be used to also CNC cut a 2.5 or 3mm CF shock tower.
Note that drop in it isn’t 100% true, you will likely need to file the body mounts a bit or drill the counter sink holes for them in the tower as I couldn’t get a perfect angle measurement for the squared side since mine rounded out from a number of flip overs without the body on. Should be a simple fix with a hobby knife or bit of sand paper. -By Paul Barsamian
https://www.thingiverse.com/thing:4081486
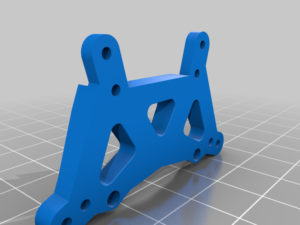
Losi Mini-T 2.0 Rear Shock Tower Assembly
I broke one so I modeled one, and so it goes. This is a two piece shock tower replacement for the Losi Mini-T. This was done in two pieces for a couple of reasons: first I plan to CNC cut this in alu and CF later, and second, it’s significantly easier to print strong parts this way vs. having it all one piece and having a lot of support material everywhere. -By Paul Barsamian
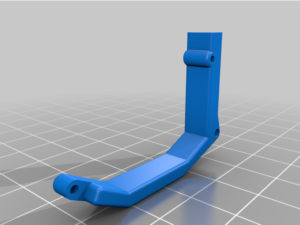
Losi Mini-T 2.0 Shock Bleeder Wrench
This is a sized wrench for the Losi Mini T 2.0 stock shocks that both holds the piston all the way in/down as well as gripping the 5mm hex to allow closing the shock up. I called this a bleeder wrench because it makes it easy to fill the shock, insert the cap/piston end into the wrench, and the slowly tighten it in while bleeding the shock so that it’s filled properly with no hydro lock.
Print at 100% infill and pla should be just fine but feel free to use whatever material you like…-By Paul Barsamian

https://www.thingiverse.com/thing:4076502
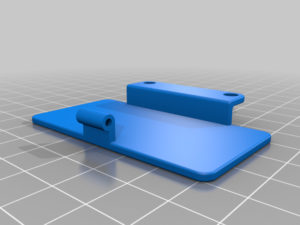
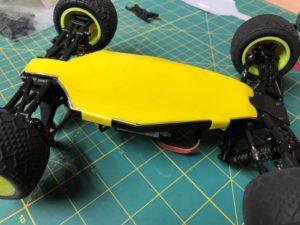
Losi Mini-T 2.0 – Belly Plate Protector
Looks like my idea works after a bit of testing. I’ve added a few options – Glue On Bank, Glue On w/Screws Exposed, Tabs with Holes for screw fastening, Screw On
Two Options – Shape with heat and glue on or Shape with heat for snap on. The Glue on STL could be cut from Vinyl also for complete coverage.
This is a 3D printed .6mm thick belly plate. Simply put them on use a heat gun to soften and mold the tabs to the shape of the chassis. Clips and unclips easily. I recommend using some double sided tap under the tabs to help secure them.
Material, PLA – the front tabs kept breaking while bashing, worked really well on an off-road carpet track
PETG – worked well but the slap happy rear agains the cobble stone I was jumping on wore through really fast
PolyCarbonate carbon filled (PC) – is a little tough to mold after it cools but holds up extremely well. If it falls off while running, just heat up the tab and secure it a little better.
-By Adam Bavuso
https://pinshape.com/items/57763-3d-printed-losi-mini-t-20-belly-plate-protector
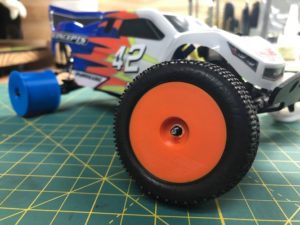
Losi Mini-T 2.0 – Wheels and Wheel Parts
Here’s a few more just for funziez I am working on. Wheels and Wheel caps for stock wheels. Wheel Plug has been tested and works. Wheels fit and are dimensional similar to the stock wheels.
UPDATE – 29 DEC 2019: Reduced the Hex by .4mm to better capture the wheel hex. Opened the Center Hole .1mm for easier installation.
Recommend printing in: PLA, PETG or PC Carbon infused NO SUPPORTS @ .15 Layer or lower (Needed Supports are build in Print Face Down) Post Processing – Put a thin coat 3D Gloop to strengthen the bond on the wheel for a stout wheel. https://www.3dgloop.com/
I just need to source some unglued rubber now. I would like to make a set for Foam tires but I know nothing about foam tires or where to get them. If anyone can point me to foam that’s about the correct size, I’ll make a set of wheels just for foamies.
https://pinshape.com/items/57845-3d-printed-losi-mini-t-20-wheels-and-wheel-parts